
Juan Sebastián Berón Ramírez
Cybersecurity | Technology | Sales Leadership
Proxmox Virtual Environment (Proxmox VE)
What is Proxmox?
Proxmox Virtual Environment is a complete, open-source server management platform for enterprise virtualization. Tailored for home lab enthusiasts diving into enterprise level virtualization. This versatile system seamlessly integrates the KVM hypervisor, Linux Containers (LXC), and software defined storage and networking functionality onto a unified platform. The user friendly web based interface simplifies the management of Virtual Machines (VMs) and containers, while also offering features such as high availability for clusters and integrated disaster recovery tools.
Proxmox Virtual Environment stands as an accessible and cost-effective solution for your home labs if you are looking to virtualize your IT infrastructure. It offers a feature rich environment for managing virtualized workloads and ensures scalability for future demands within the dynamic context of a home based computing environment.
Installation
Installation Requirements
- A physical or dedicated «server». You could use your old PC or Laptop.
- Virtualization Support on your machine.
- 64-bit CPU.
- A minimum of 4GB RAM.
- 500 GB SSD storage.
- A USB stick with at least 8GB.
- Ethernet Cable to your machine (Proxmox will not use Wi-Fi)
Enabling Virtualization
Note: If you are installing the hypervisor as a Type 2, on some computers you will need to enable the virtualization option. You can find this in the computer’s BIOS; check with the computer manufacturer. Do the same for Type 1 hypervisors to ensure it will work. (Just in case)
Now on the «manager» machine:
Remember, this is the main computer from which you will access the Proxmox (server) to configure absolutely your entire lab.
Okay, let’s get to work…
Download Proxmox ISO Image
Go to the following link: https://www.proxmox.com/en/
Click on Downloads
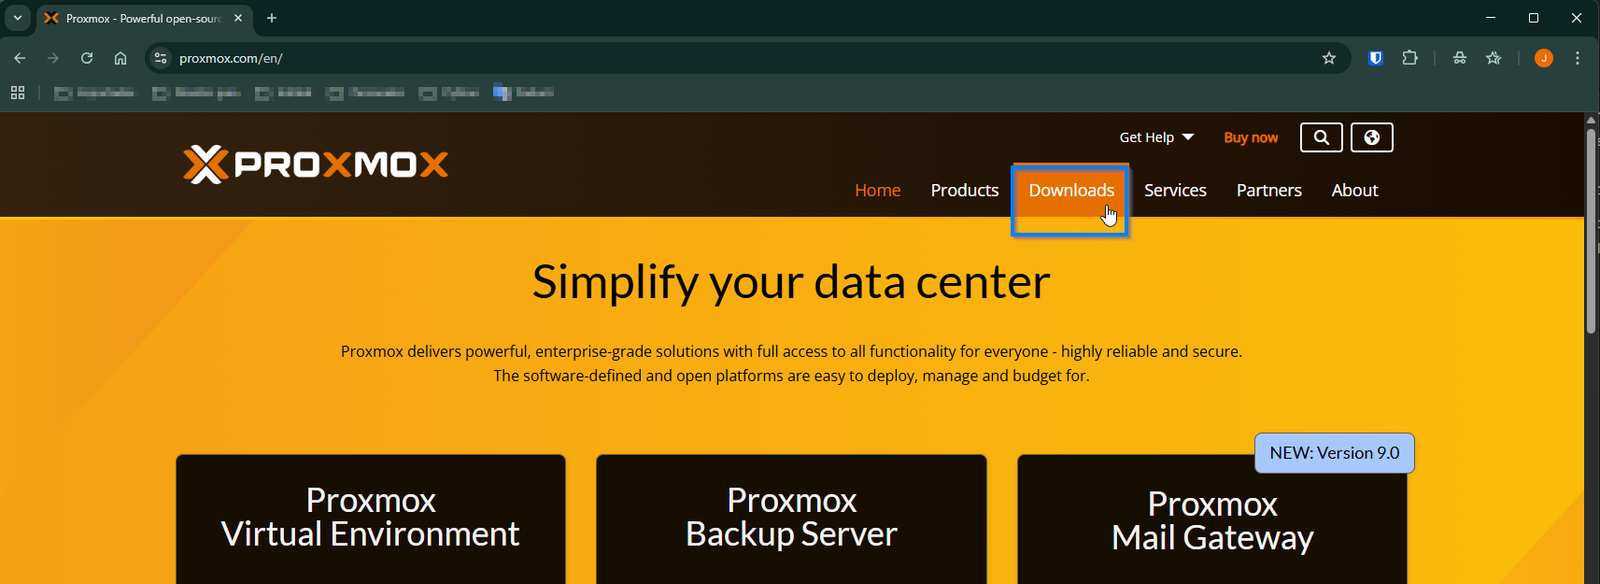
Click on Proxmox Virtual Environment
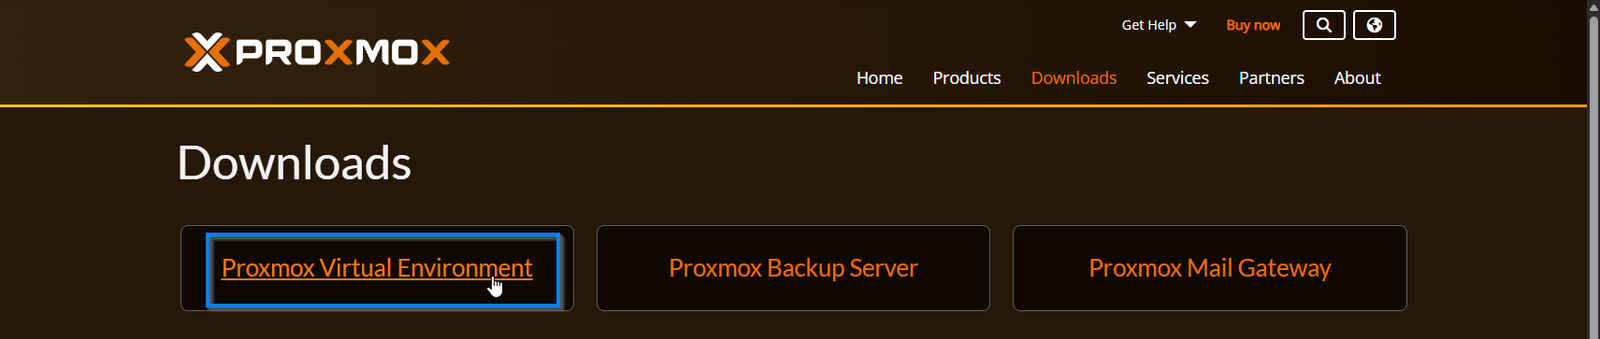
You will be now on the Proxmox Virtual Environment Archive where ISO images are.
Select ISO Images to continue.
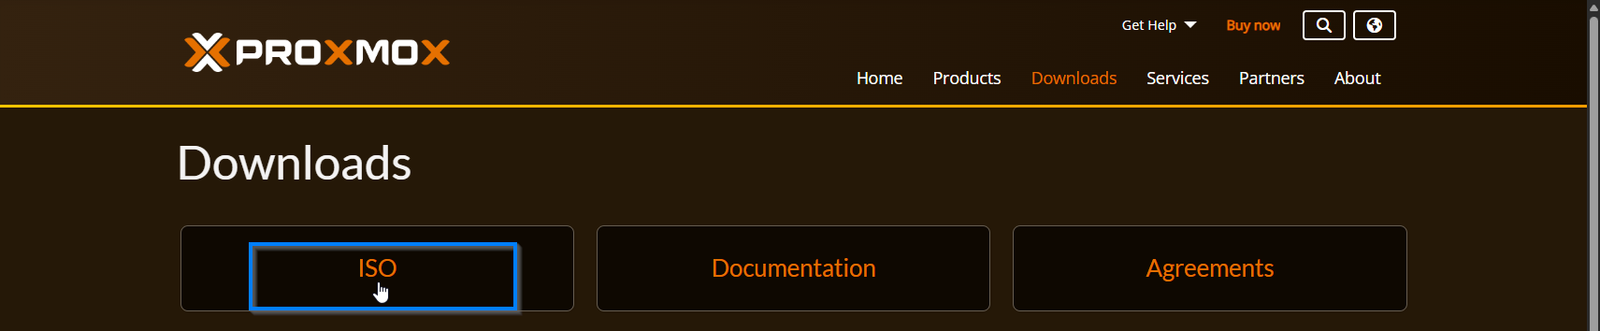
You must be on the versions of the ISO’s.
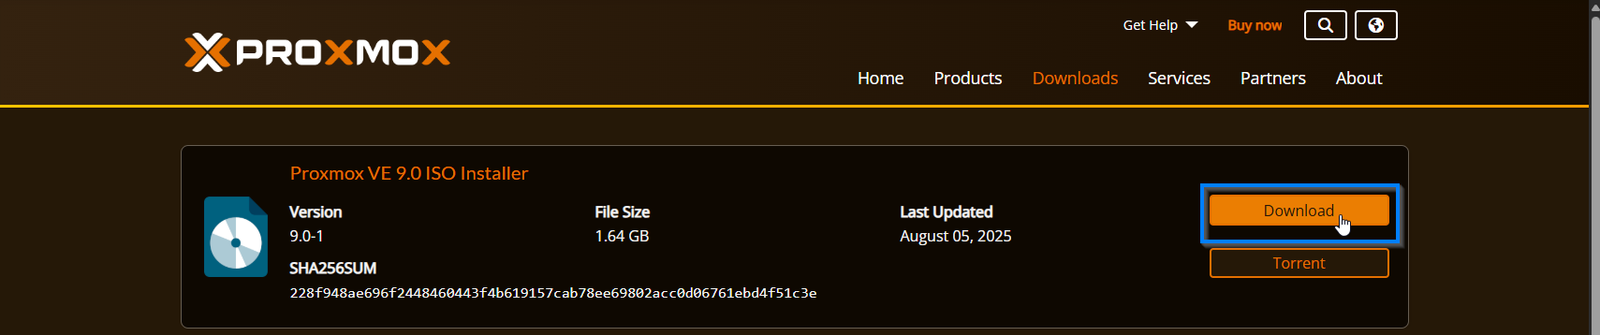
The one available at the moment I’m writing this document is this one:
Click on the Download button
Remember that I mentioned that you will need a USB with at least 8GB? Now is the moment to use it.
Once the download is completed, burn the ISO file into USB flash drive and make it bootable.
In Windows, you can use Rufus software.
In Linux, you can use Balena Etcher.
Or your favorite ones, the thing here is to create a bootable USB stick with the Proxmox VE ISO you just downloaded.
In my case, I’m going to use Rufus.
Let’s burn the ISO:
Go to the following link: https://rufus.ie/en/
Find the downloadable option here:
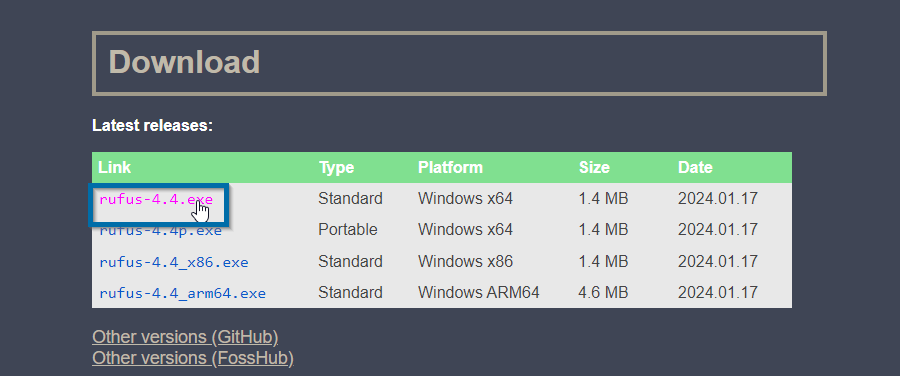
Once you download it, just launch it:
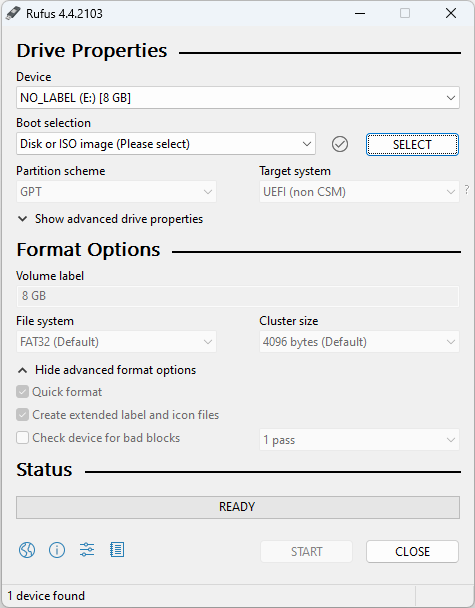
Now here we are going to configure the Rufus to burn the ISO.
Make sure you select the flash drive you plugged in and not anything else
Select our image or our iso. The one you just downloaded
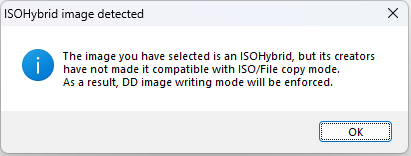
When you select it, maybe a popup windows will show, with a message: As a result, DD image writing will be enforced, just click OK button.
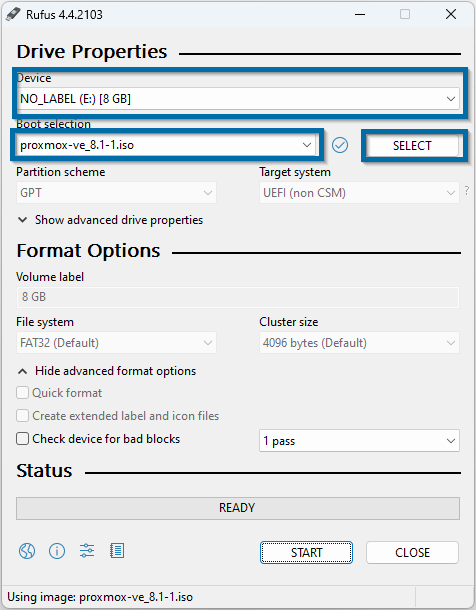
Click the START BUTTON, and this will burn the ISO into the USB.
When it ready you will see the message on the button.
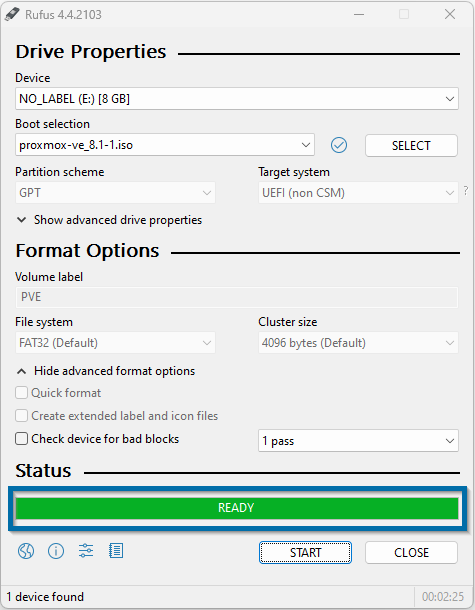
Now you can eject the USB flash drive.
Use the USB on the server machine.
Remember to connect your «server» machine with ethernet cable. Don’t miss this.
Depending on the computer where you’re installing Proxmox, you’ll need to configure the boot process to boot from the USB drive containing the Proxmox ISO file.
Once you complete this boot process, restart your computer and the Proxmox installation process will begin.
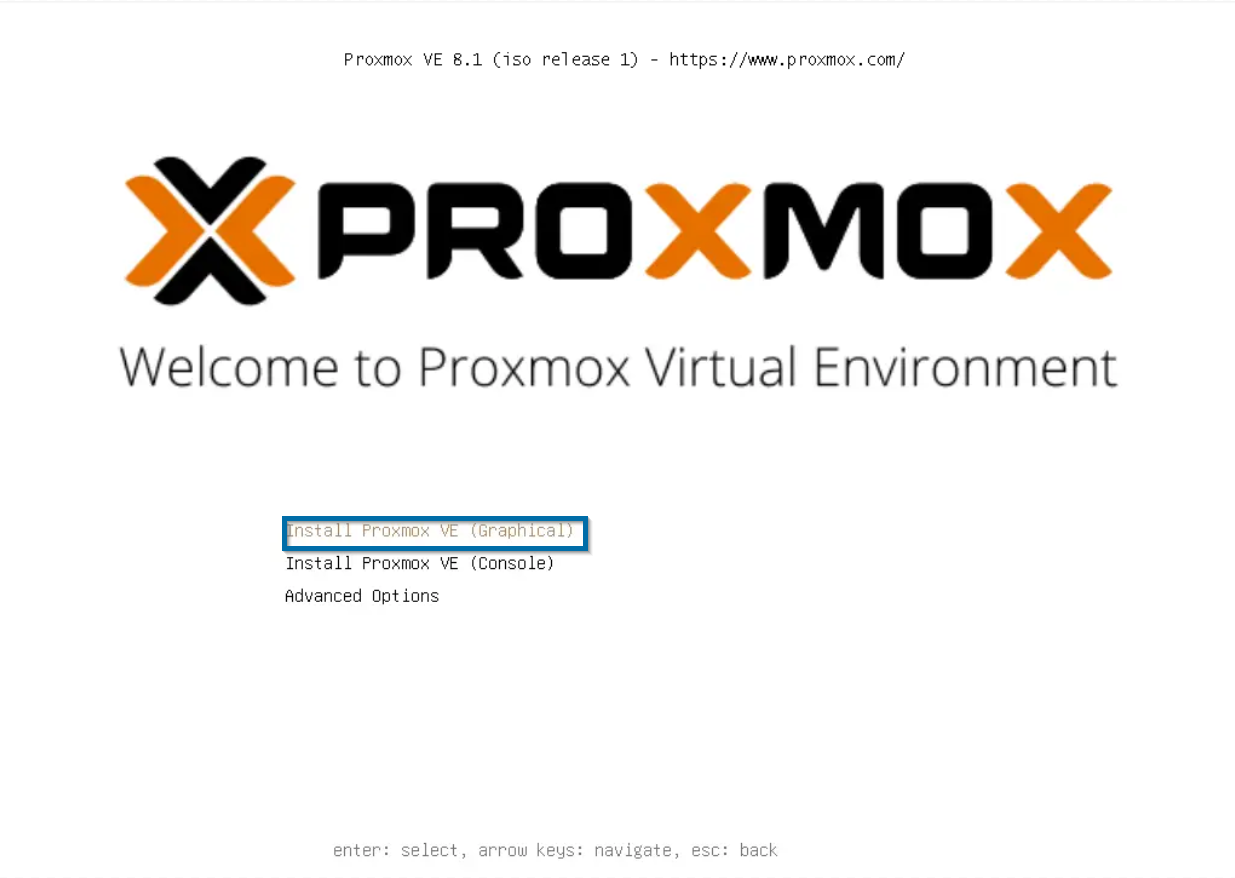
Once it restart you will see this screen on your machine:
In this screen select the first option: Install Proxmox VE (Graphical)
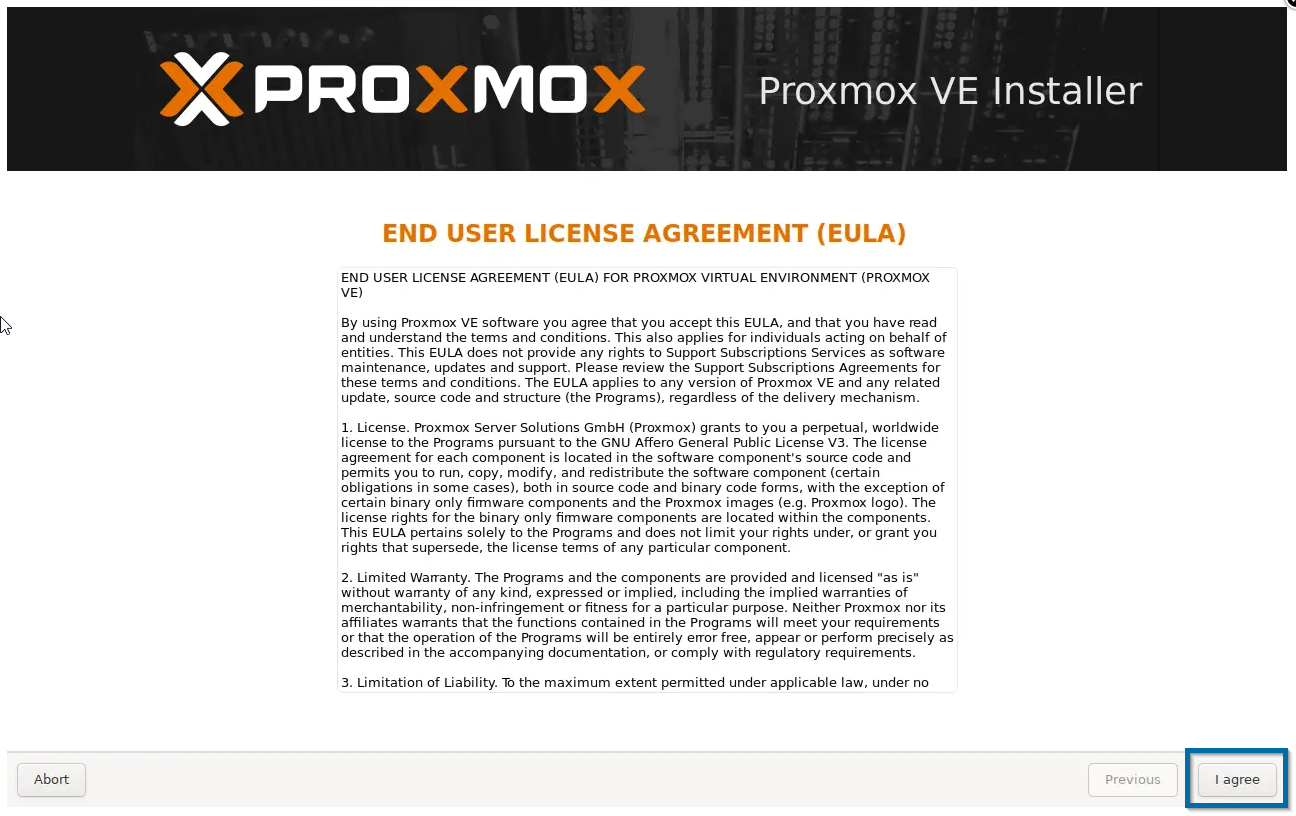
Next just click on the I agree button to accept end user license agreement.
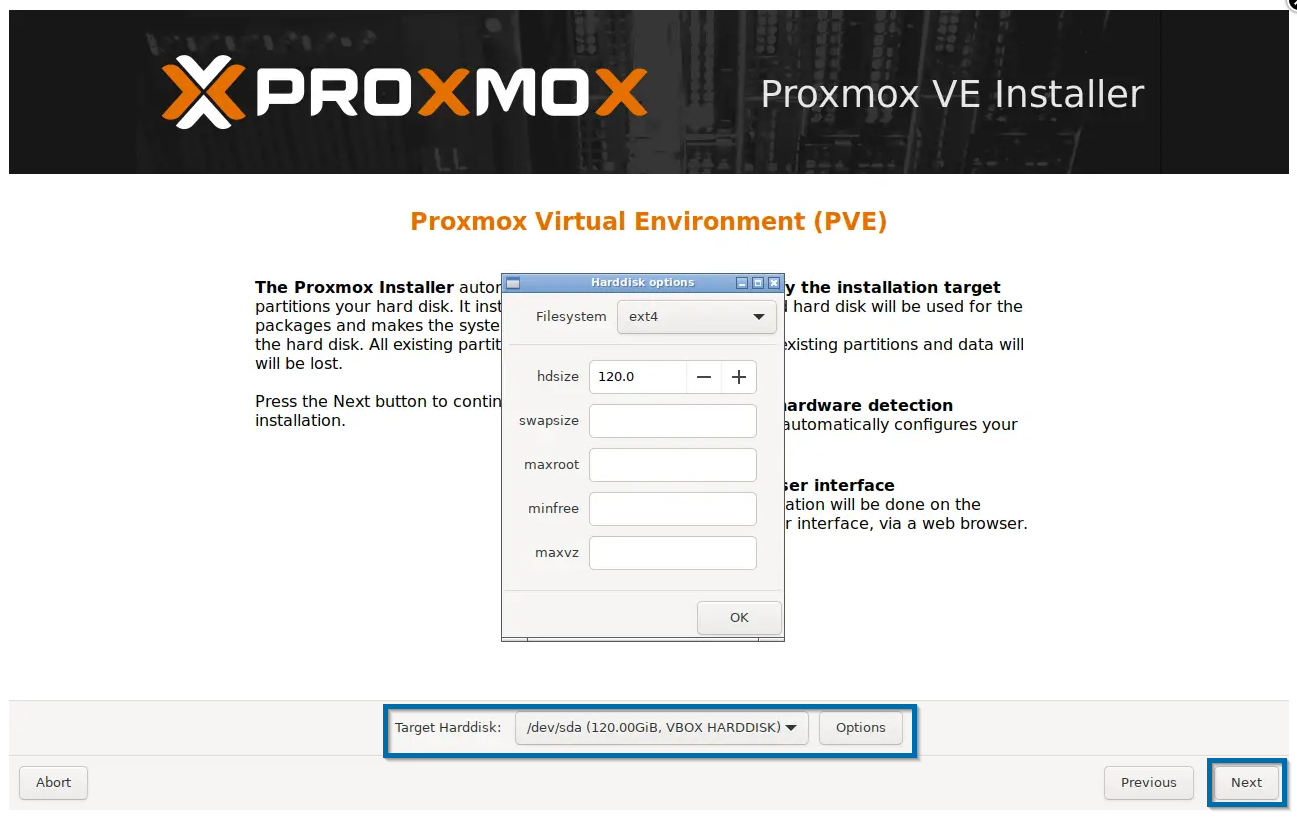
Next you will have to select the hard drive, depends on what you have install on the machine, but in my case i just have 1 hard drive, so i sill install on the default one.
If you have more than one, you need to select the one you wanted to the Proxmox be install. Then click next.
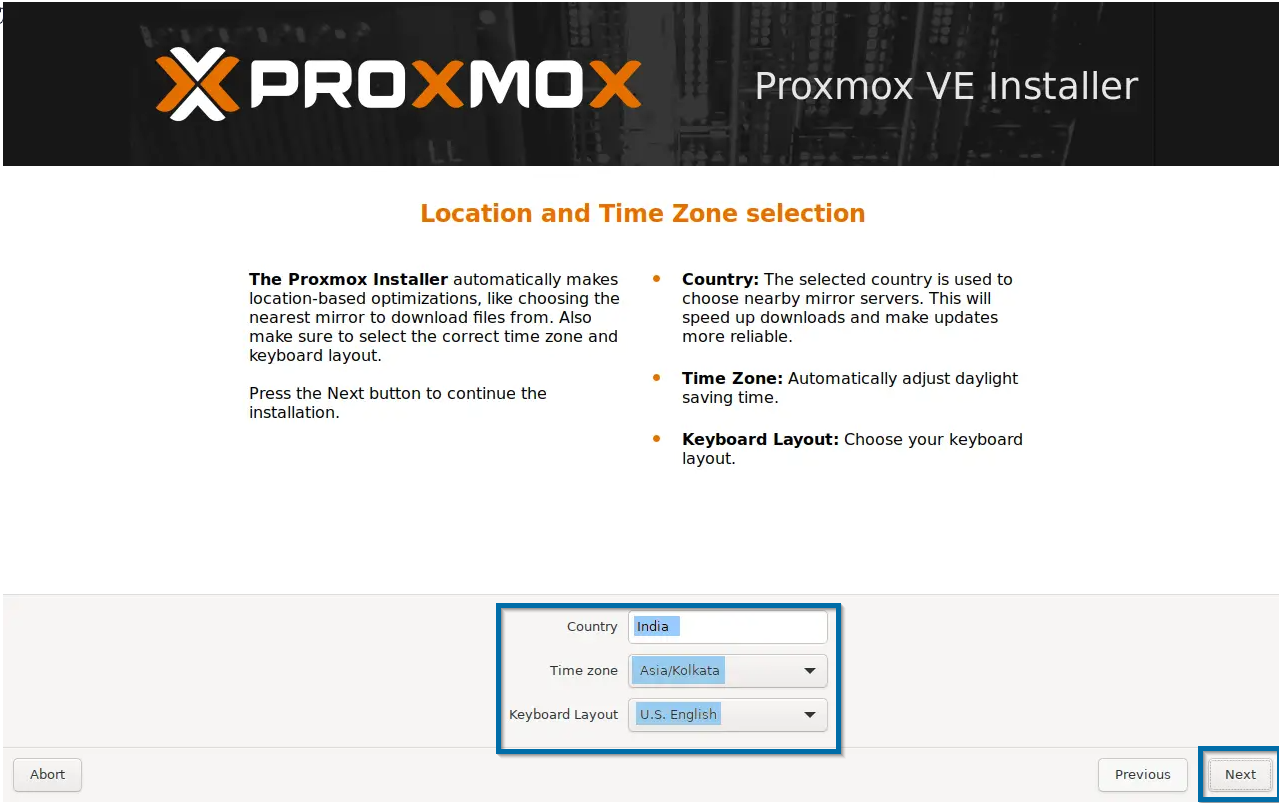
Then, just put the information of your localization.
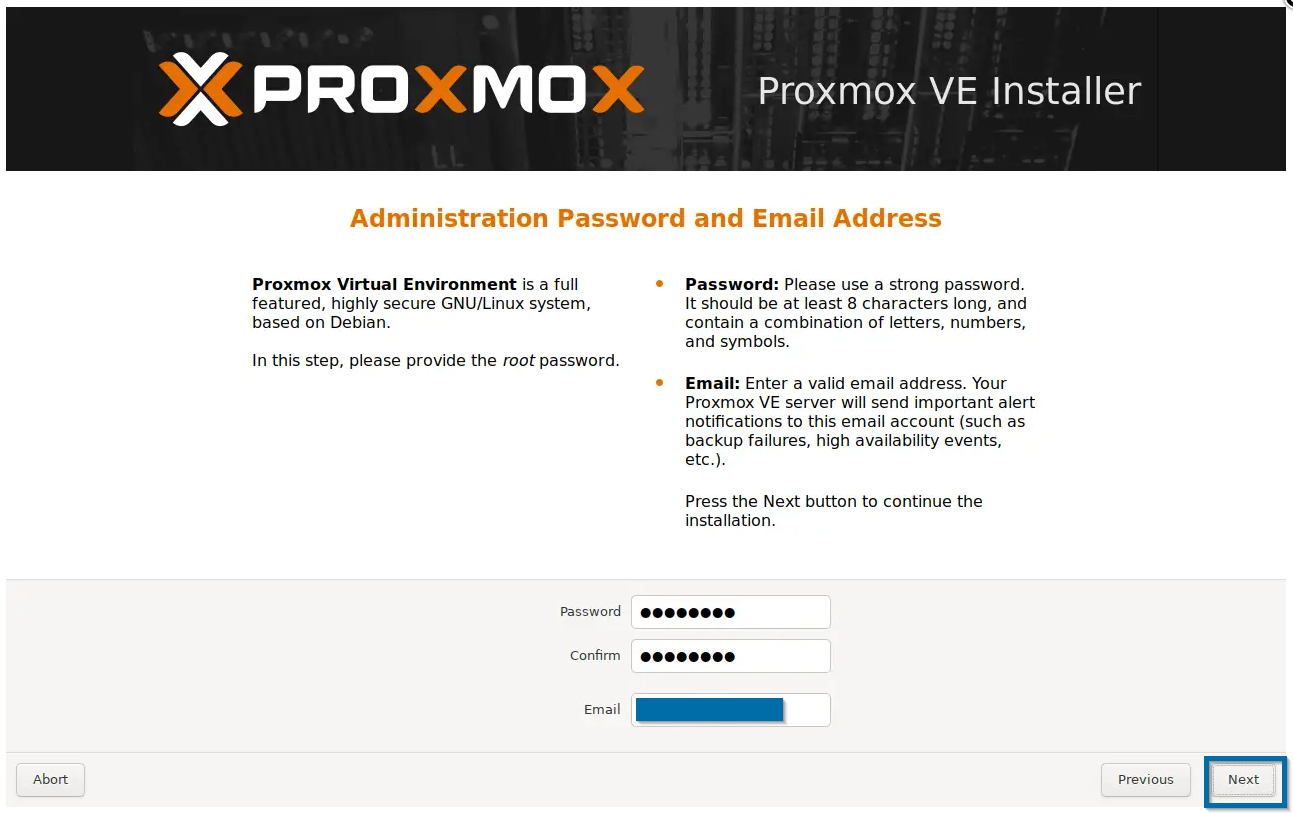
Now you have to create a password for the Proxmox VE web interface. This password will be used to log in to the Proxmox VE web management console. Also specify the valid email address where all notification will be sent.
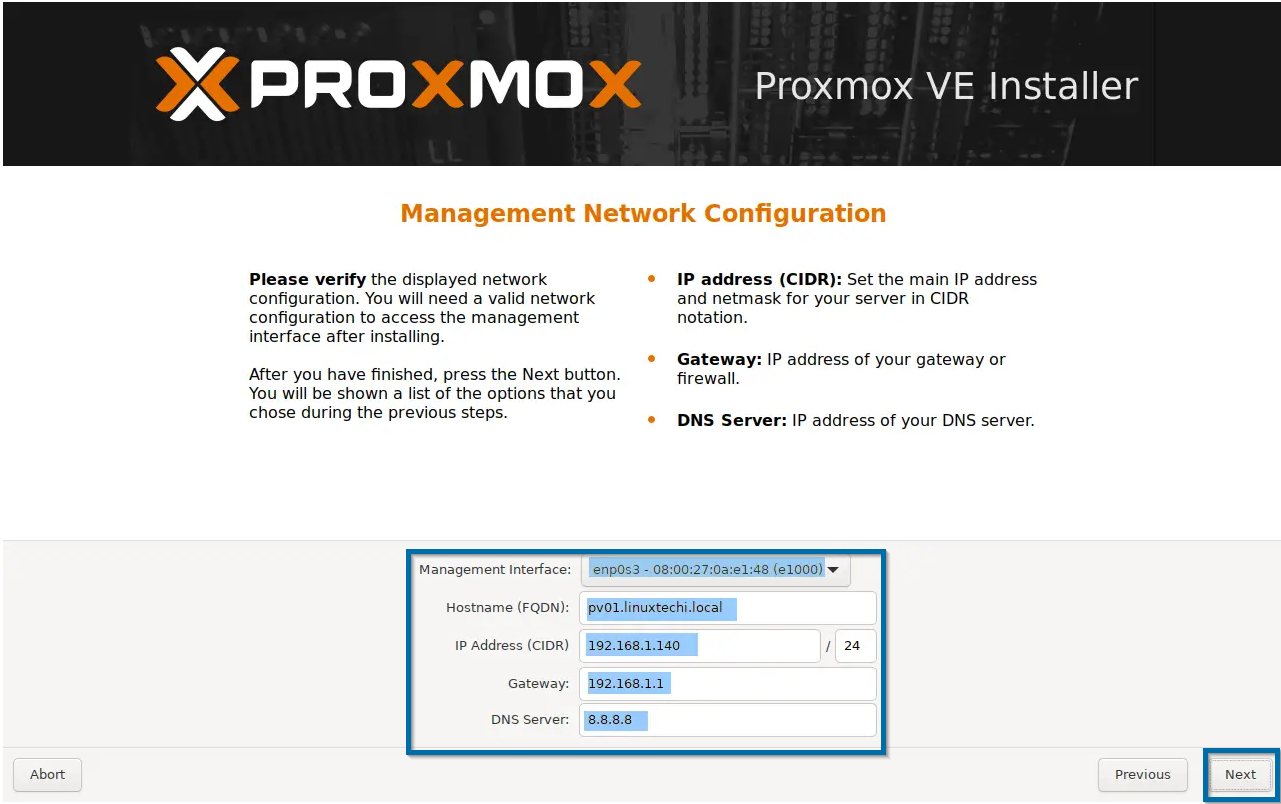
Next, you’ll need to configure the network settings for Proxmox VE.
Set Hostname
IP address
Gateway
DNS server.
Ensure that you specify the correct network configuration according to your environment.
In some cases it will pull the information for you, but in case you need to change for other kind, just enter what it corresponds to.
Click Next
Here just check your installation settings, when everything is ok for you, click Install.
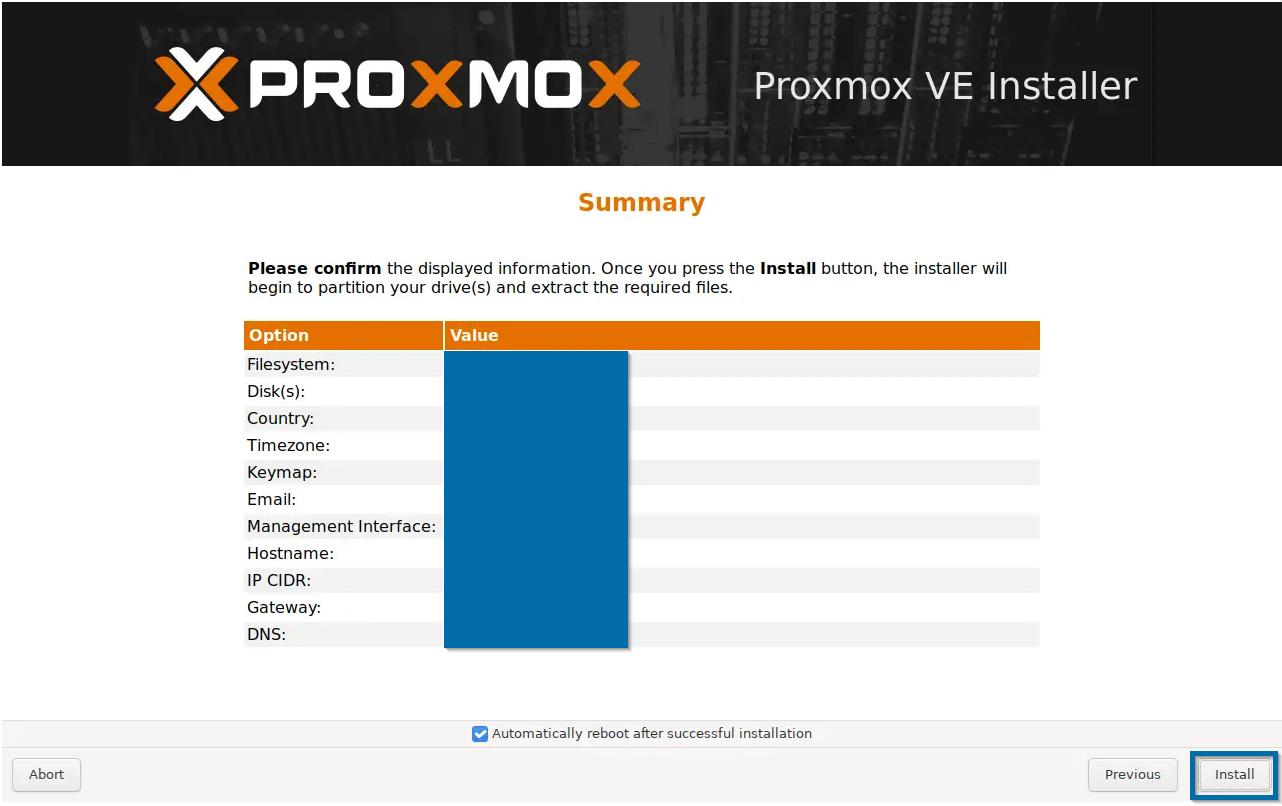
Then the installation will begin, and Proxmox VE will be installed on your bare metal «server» machine.
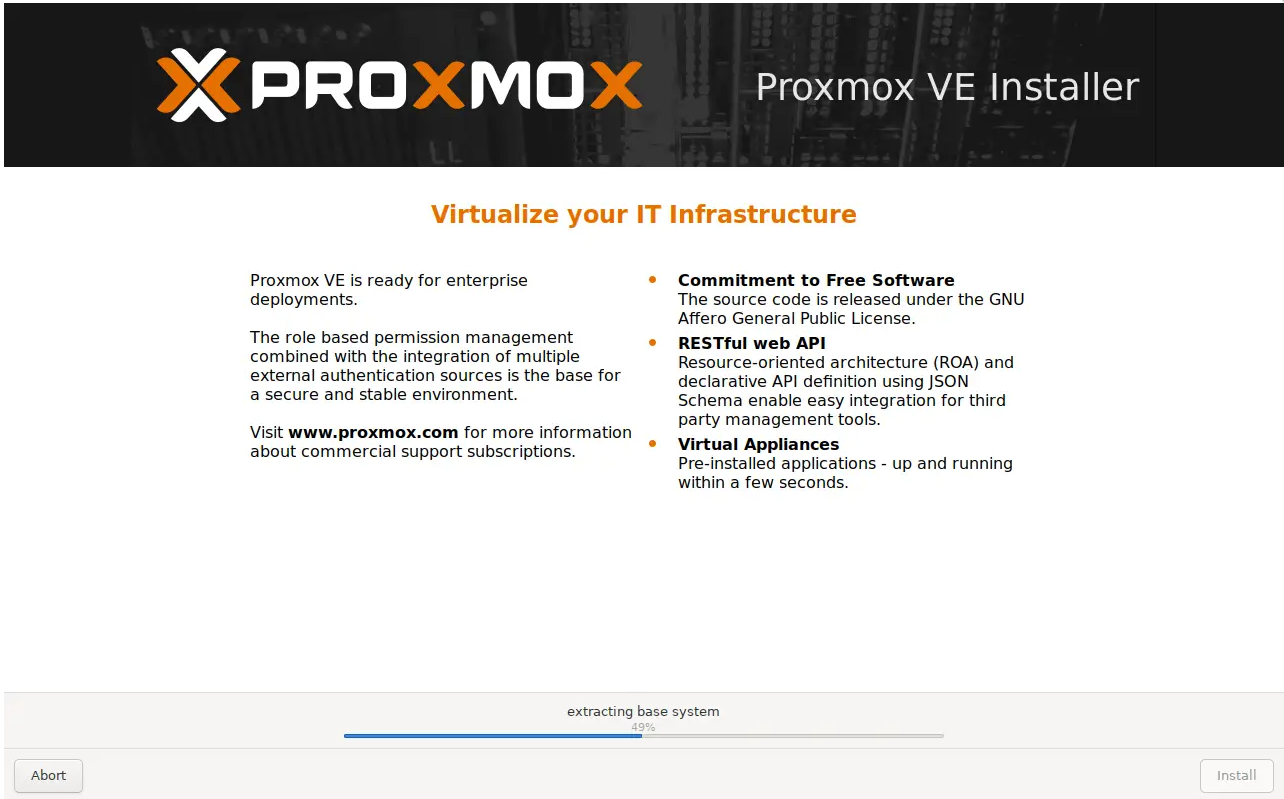
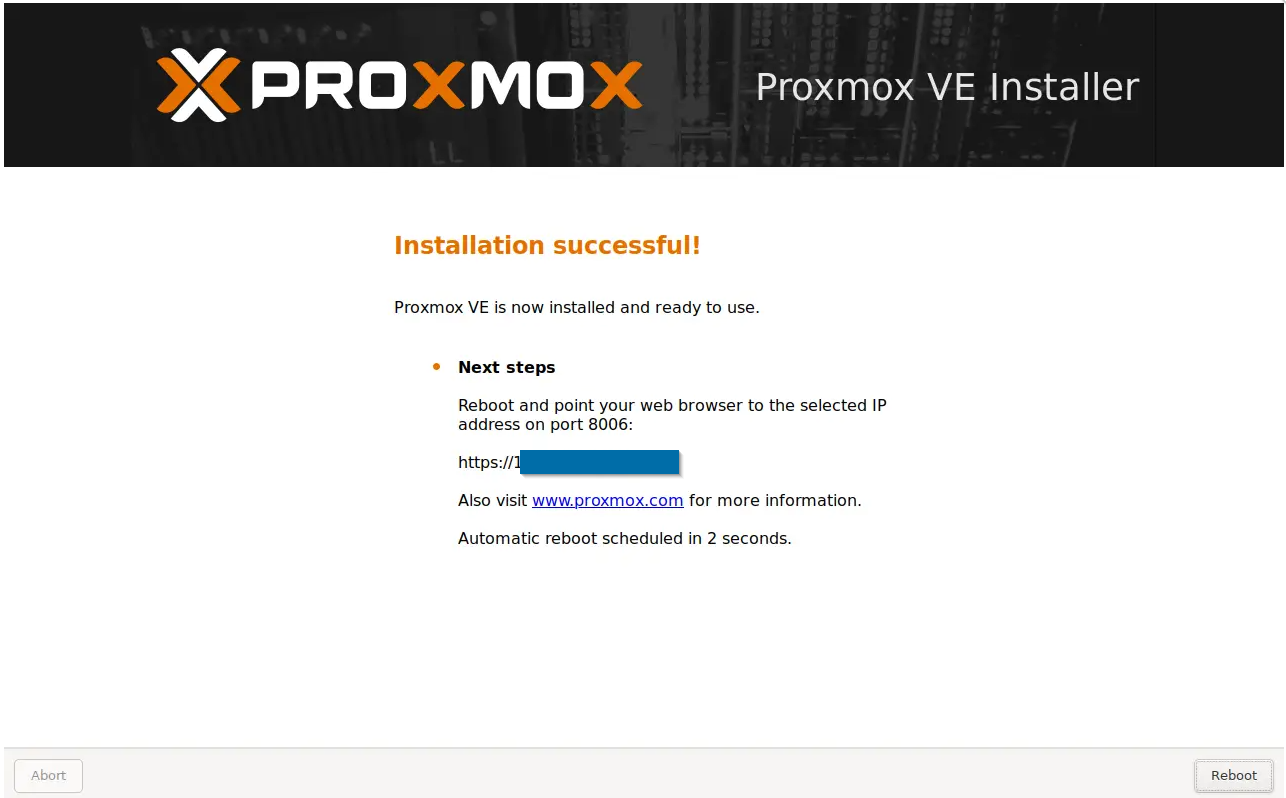
Once the installation is complete, the machine will be rebooted automatically.
Don’t forget to remove the USB, then the Proxmox VE will boot from the installed disk.
When it reboots, you will see this screen, always you power on you «server» machine
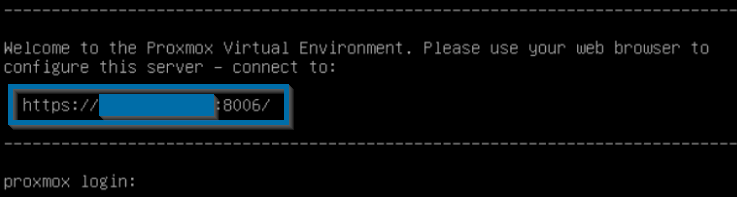
That would be the link or the info you are going to enter on a web browser from the «manager» machine.
Now it’s time to go to the «manager» machine and leave the «server» machine aside.
From the «manager» machine and from the web you should now have access to your Proxmox «server» machine.
Accessing your Proxmox «server» machine
Go to the «manager» machine, open a web browser, and enter the information you got on that above image.
You will get the following:
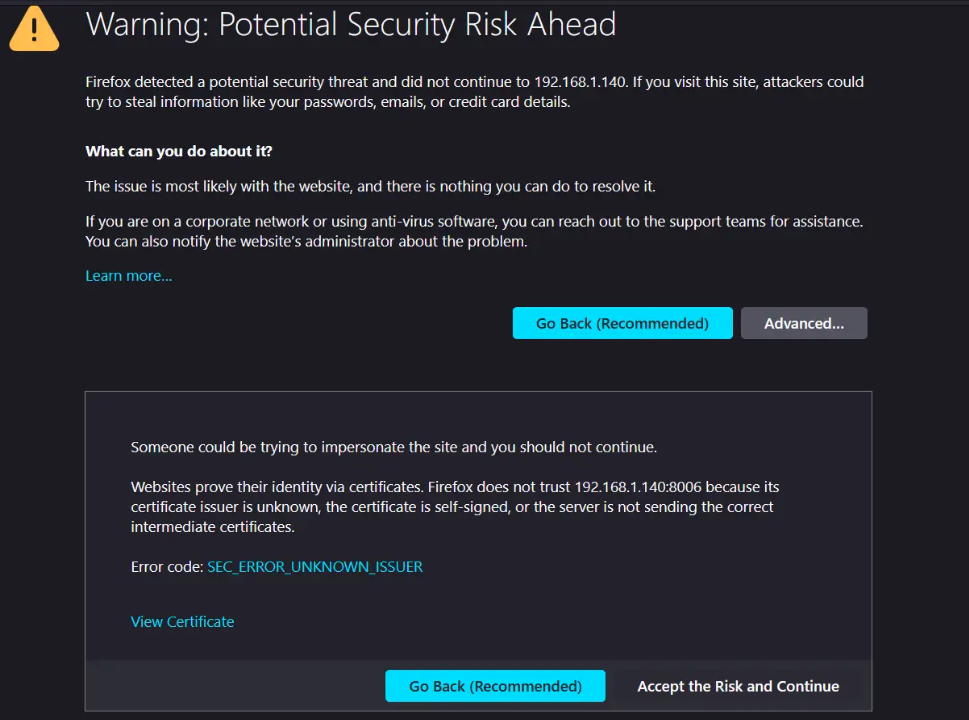
No worries, it is normal. It means that you don’t have the SSL certificate on your «server» but is fine, it is your «server». Just click on accept the risk.
An now you will enter your Proxmox:
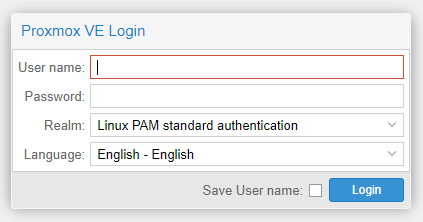
Provide the information to log in:
Username: root (by default)
Password: (the one you configured during the installation)
Hit login
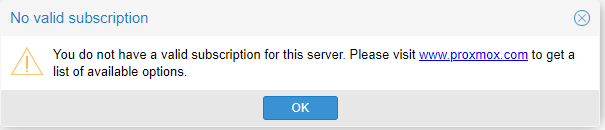
When you login you will get the following message:
No subscription
But no worries this is for free
This is just if you need help they can support you but you got to pay for it.
But we don’t need this and we’re fine so, just hit OK.
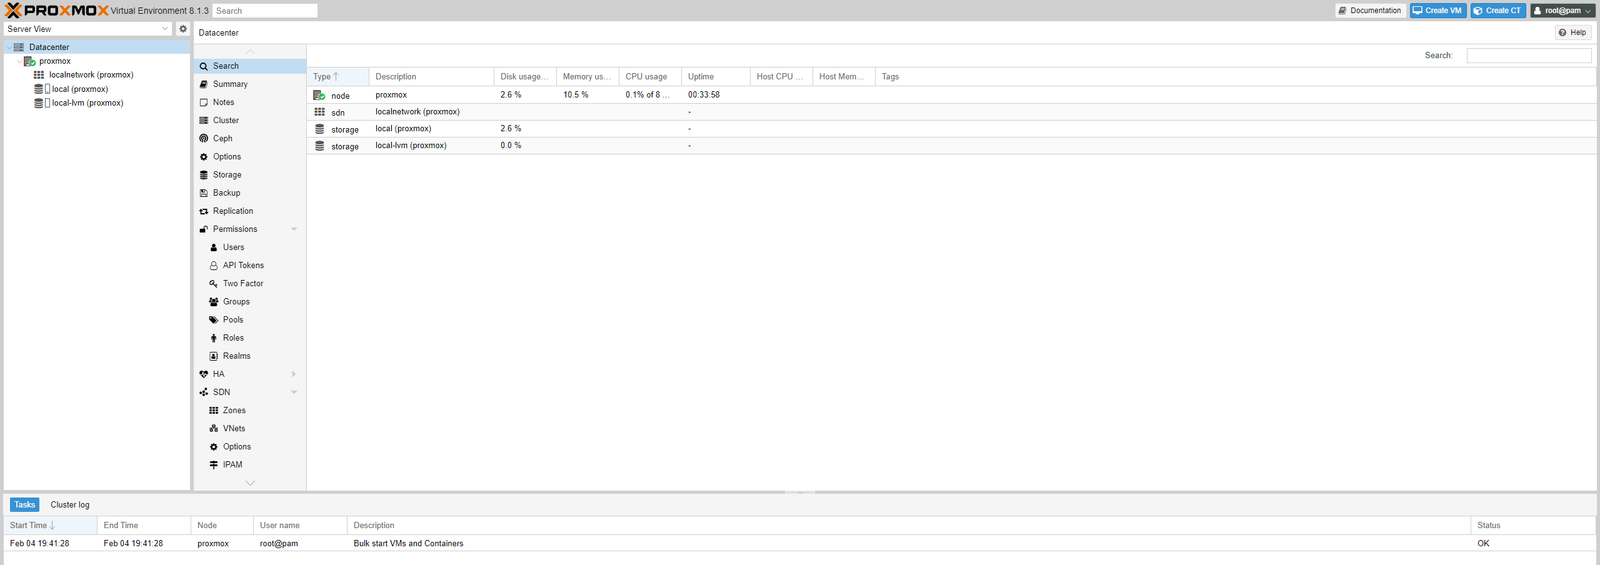
Now you are on your Proxmox «server» machine:
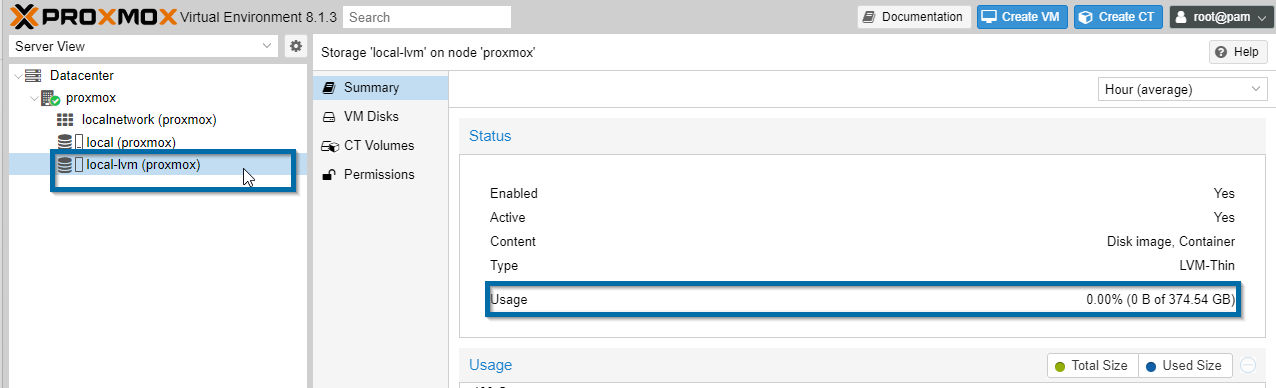
The first configuration we are going to make, it will be to increase the storage. Just because by default out of the box, you are not getting the full space to use it for your Virtual Machines.
Here is what I am saying:
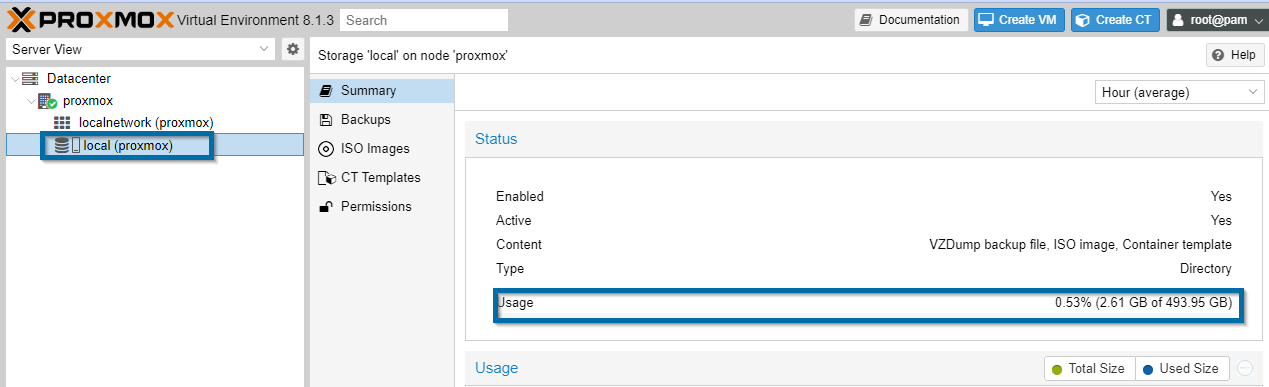
Click on the local-lvm storage option, you will see that the usage is different from the total space you have on your hard drive, but other thing is that on this one, this amount, you can’t use it for your virtual machines, you have other one for this.
Now select the other option we have, the local one; this is the one you will use for the virtual machines, but as you can see the amount, is much lower than the real one you have on your hard drive. We are just going to fix it:
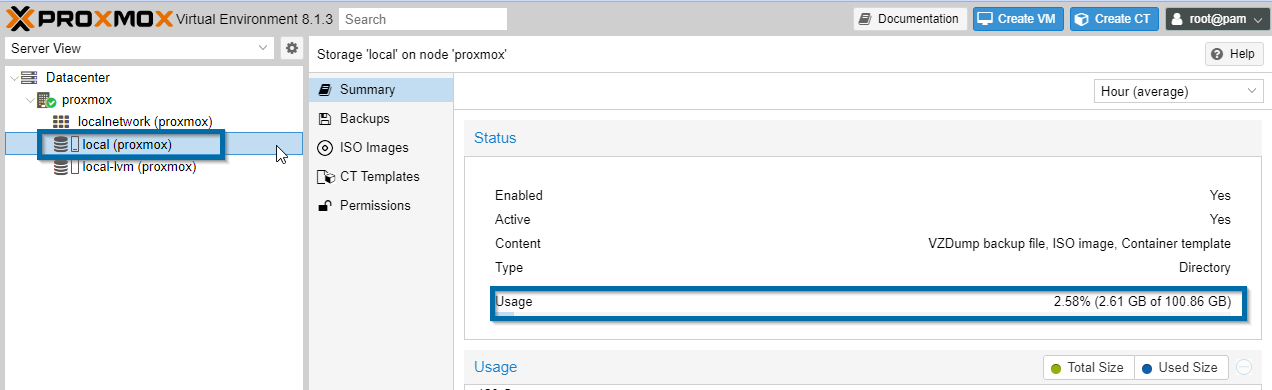
What we are going to do is to delete the one we can use for the virtual machines. So go an select the Datacenter option on the left side, the first one:
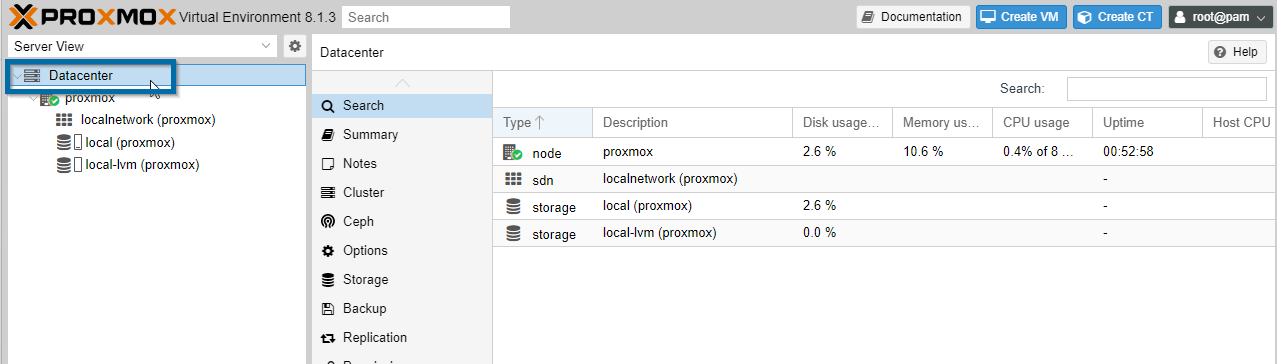
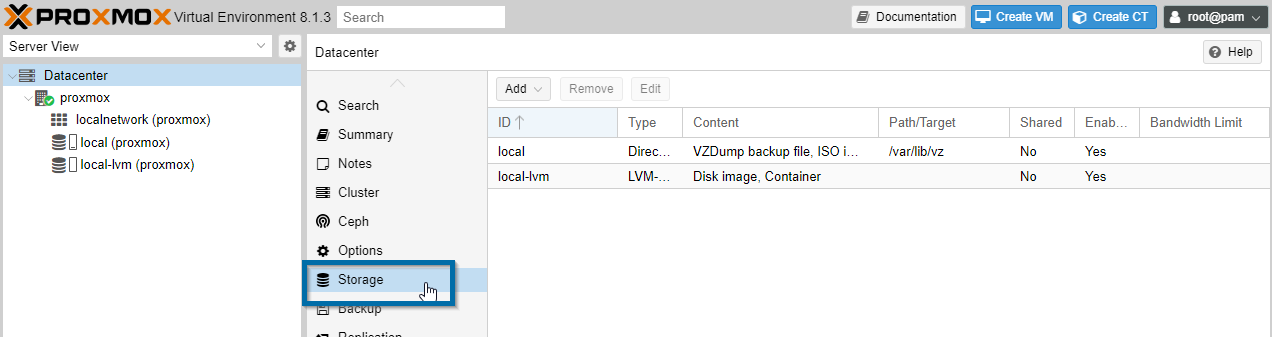
Here, select storage options:
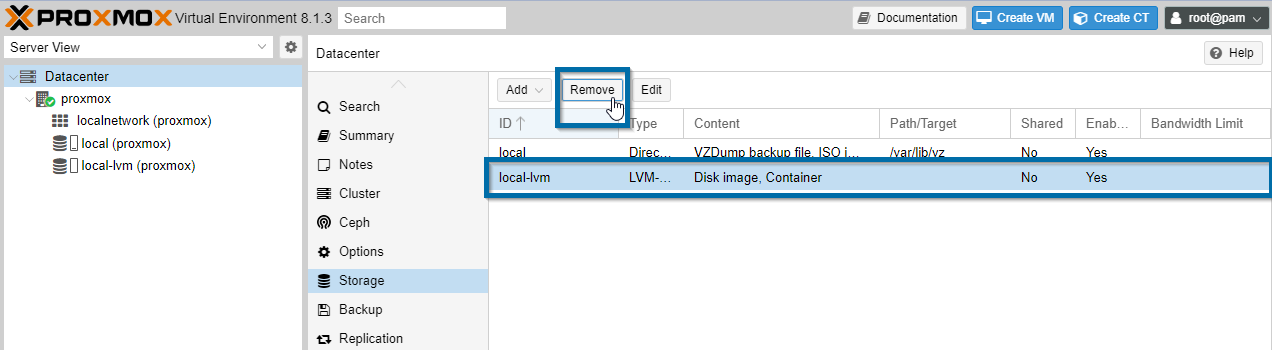
Then, select local-lvm, and hit the Remove button on the top, and click Yes
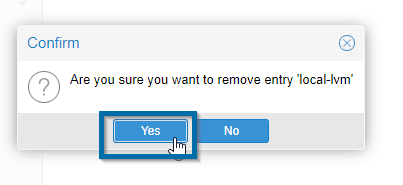
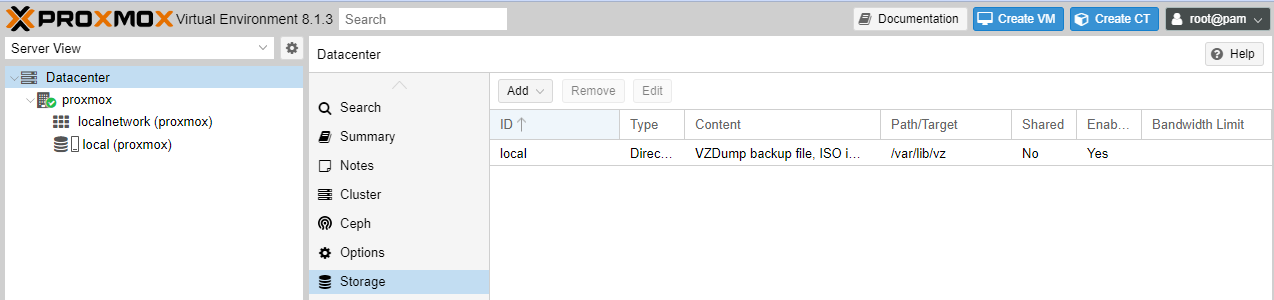
You just deleted it
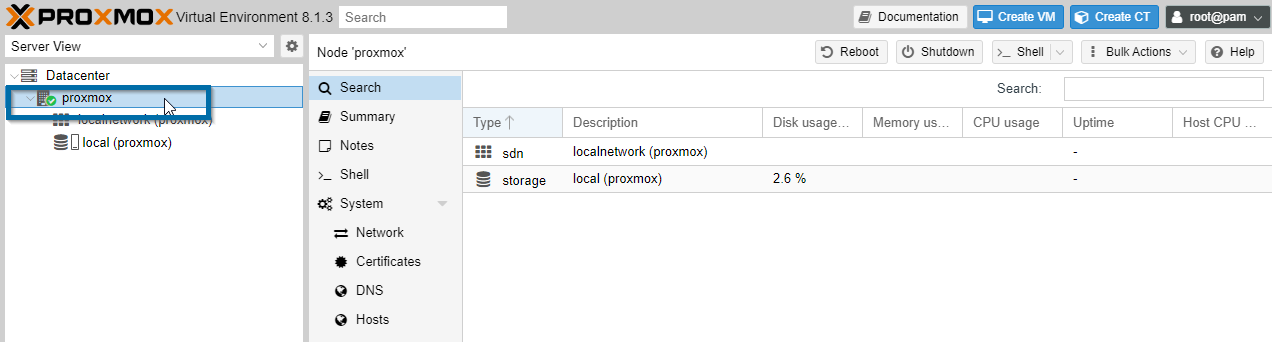
For the next steps, we need to go to the Command Line, so go to your node, in this case mine is called proxmox
Here you will have to go to the Shell:
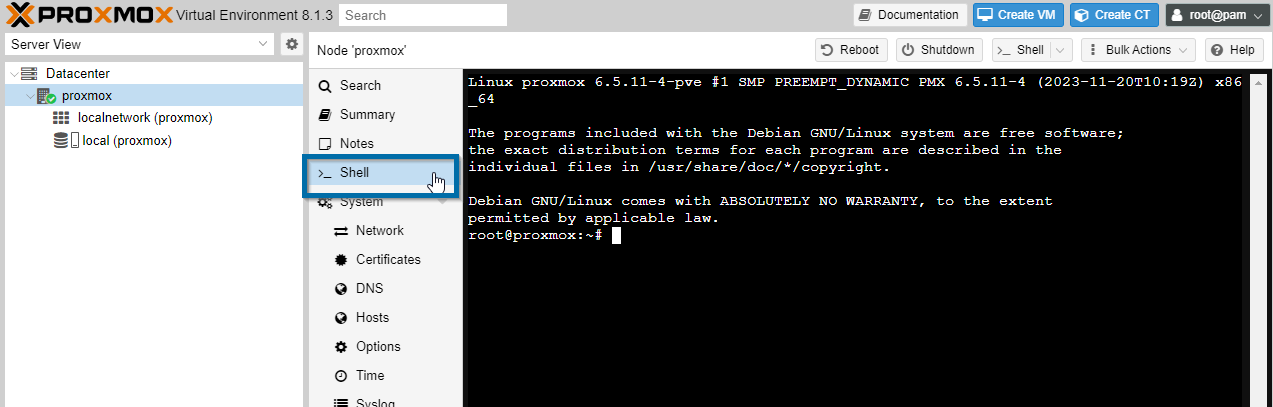
Now, on the command line you will need to enter a few commands:
1st one:
lvremove /dev/pve/data
Press enter
Then say Yes
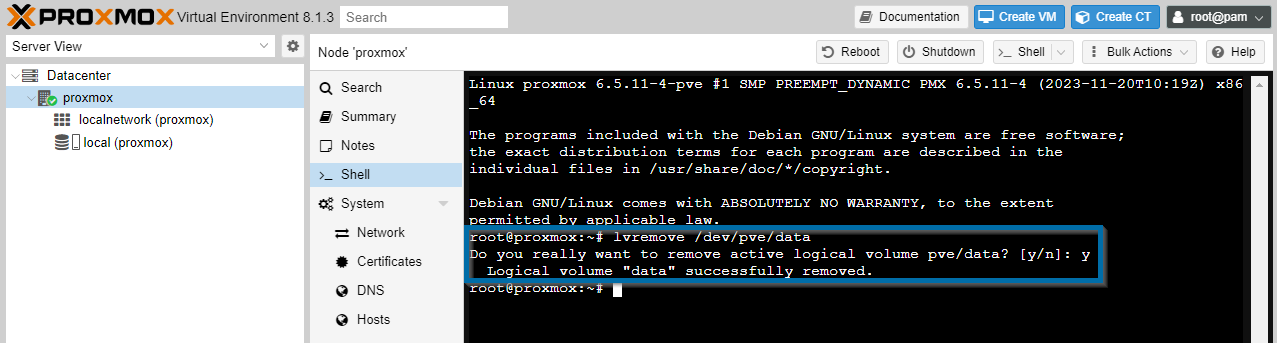
The 2nd command will:
lvresize -l +100%FREE /dev/pve/root
Hit enter
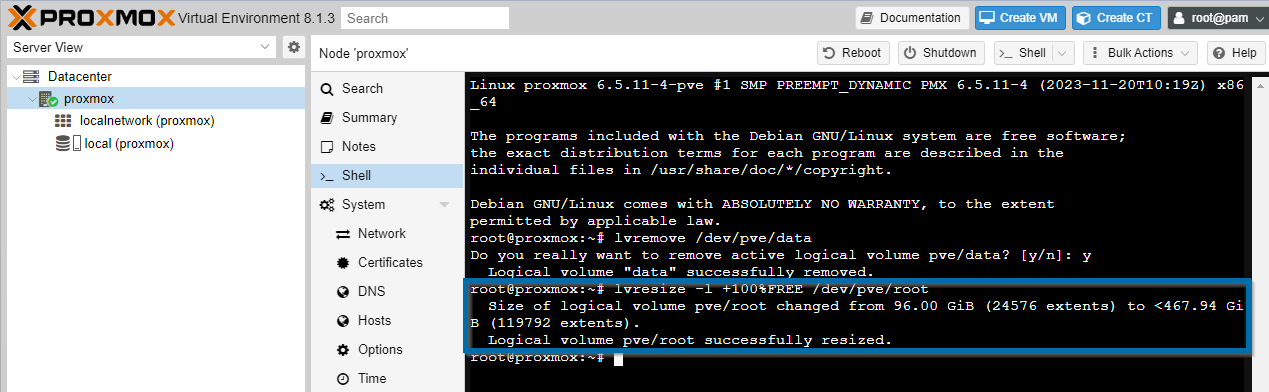
And the 3rd and last one will be:
resize2fs /dev/mapper/pve-root
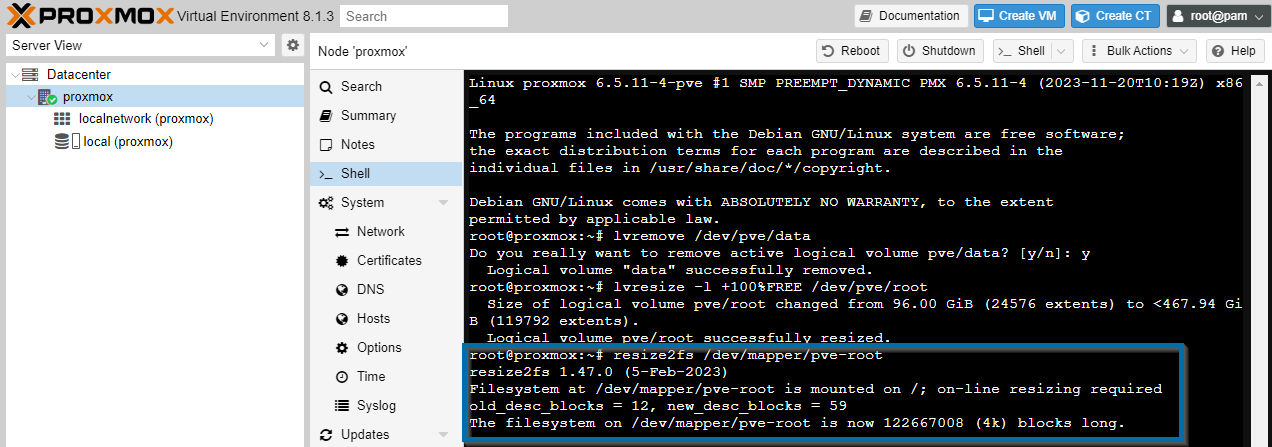
Now if you check again your storage (local), you will see the total and real amount of your hard drive:
If you want to update and upgrade the Proxmox, you will have to change the repositories to No-subscription, this is because you are on the Enterprise repositories which you need to have a license to get all the features. But in this case we are working on the free version.
Now, just go to the node, and the select the Repositories on the tree menu:
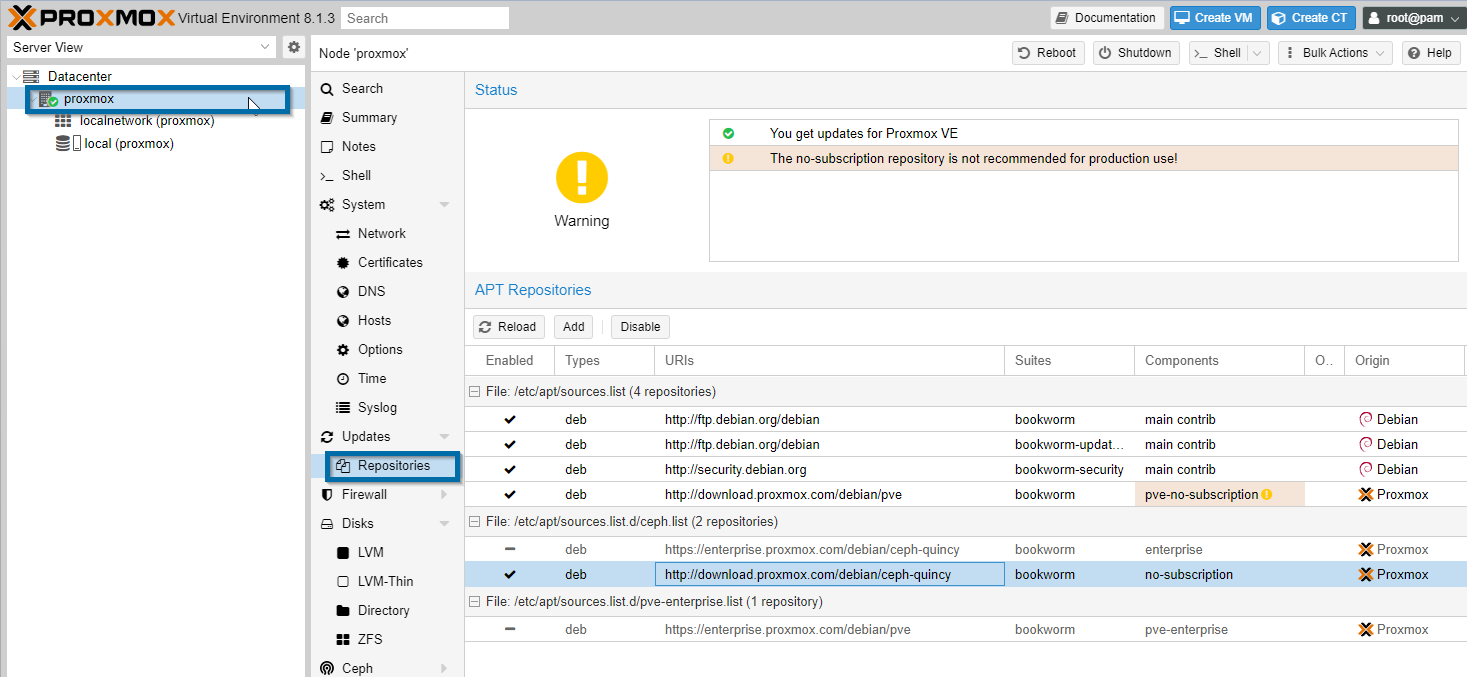
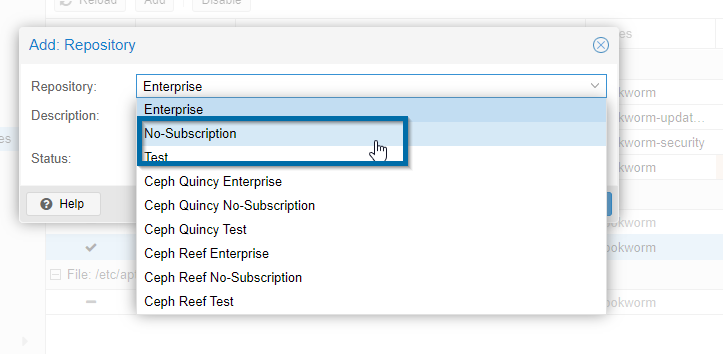
Click on Add, and look for No-Subscription and Ceph Quincy No-Subscription, add them
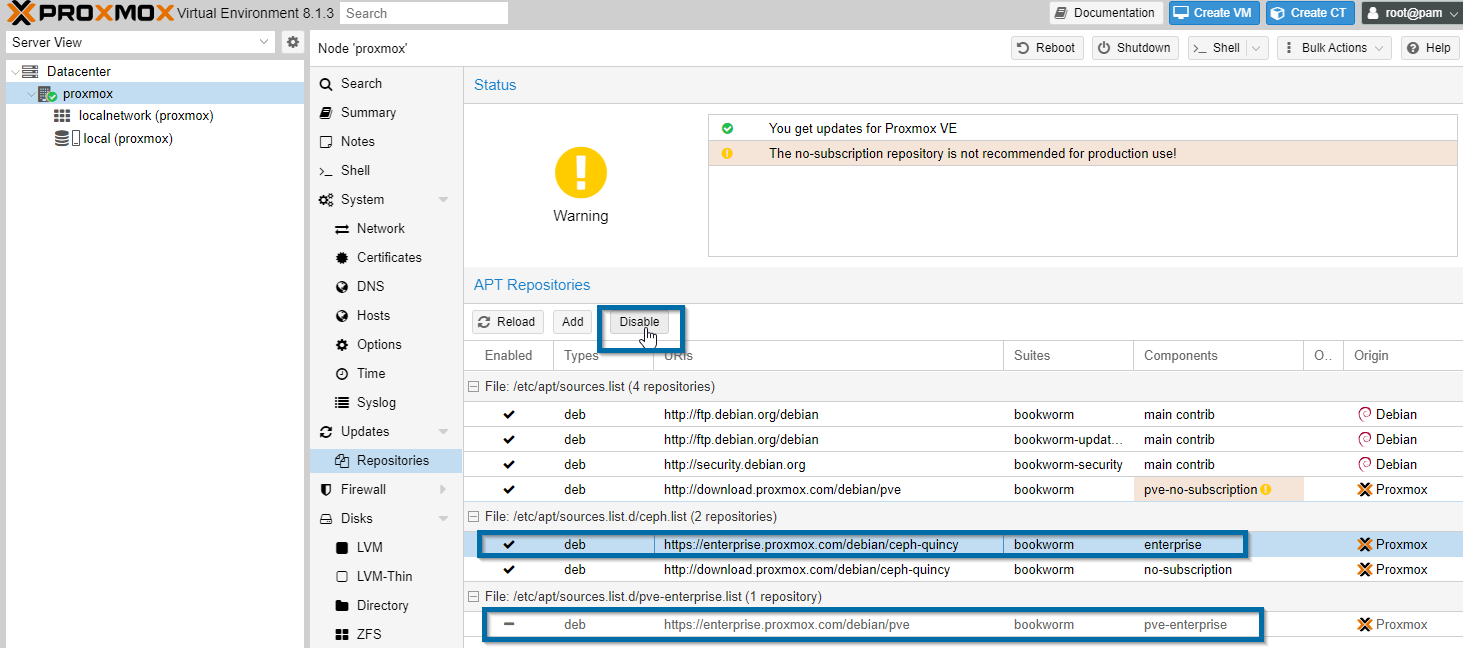
After this, on this same option, select the 2 options that shows enterprise and click on the Disable Button.
Now you will be able to enter the update and upgrade commands on the shell. Remember to always update and upgrade your «server».
Commands:
apt update && apt dist-upgrade -y
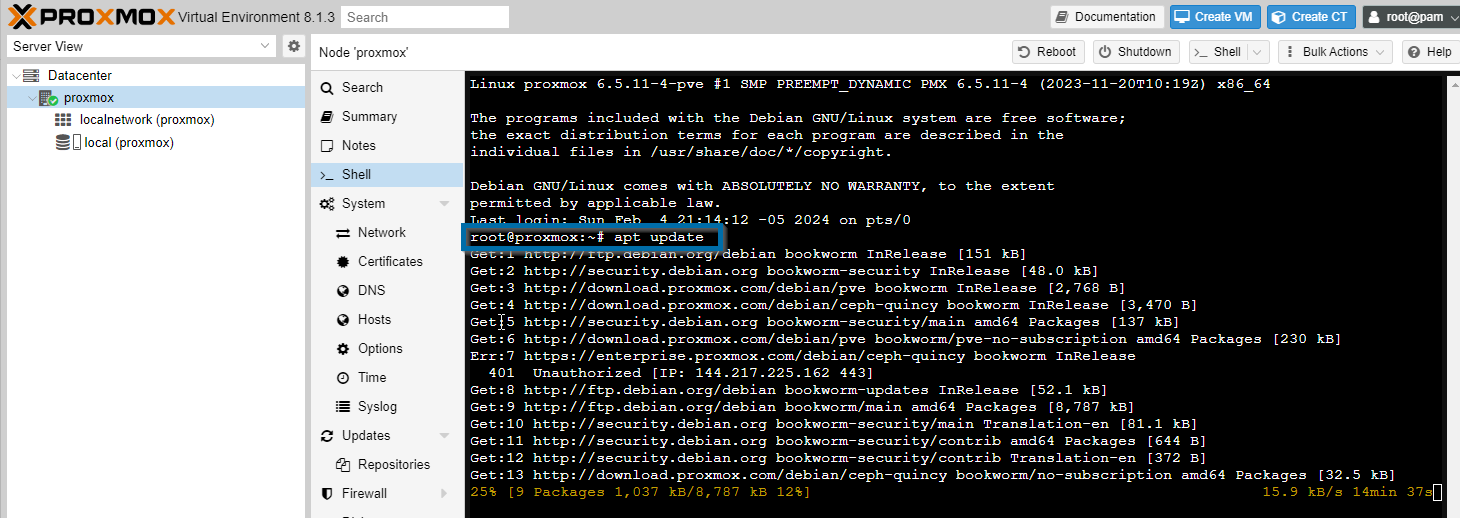
You can do it on separate commands or in just one.
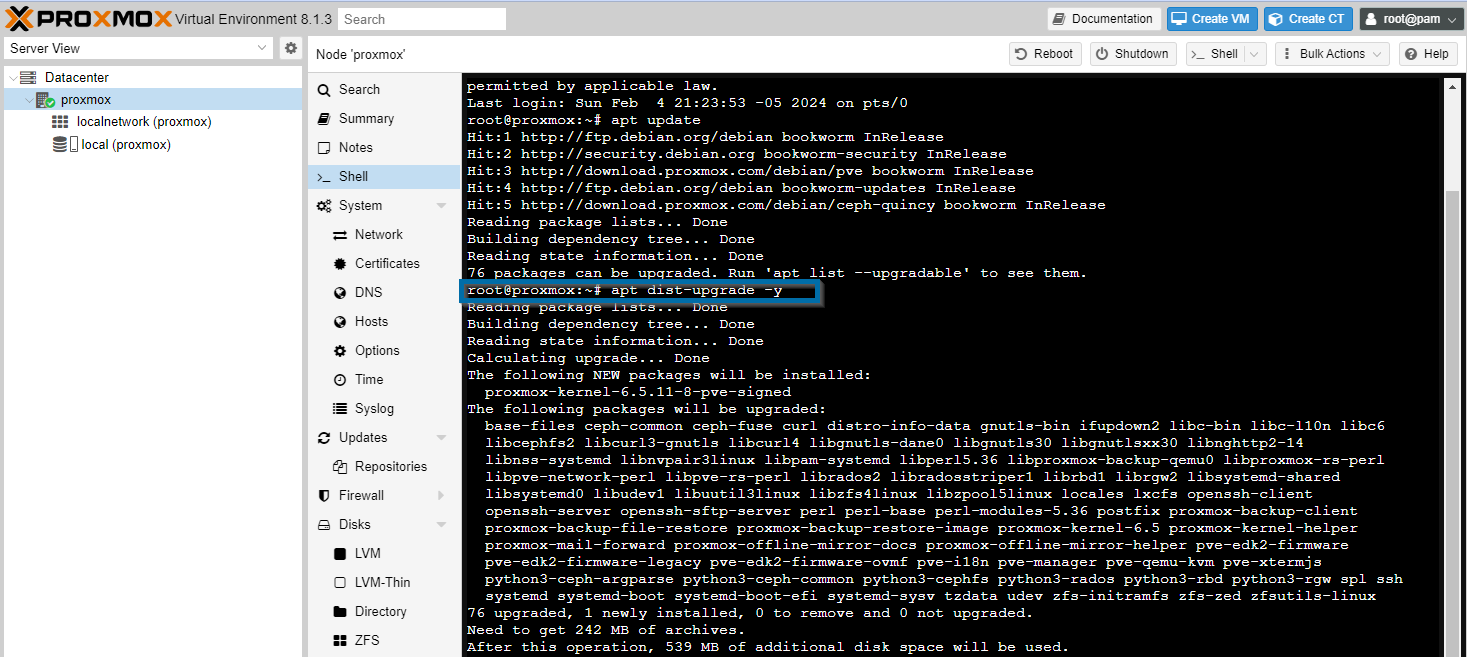
Once all your server is upgraded:
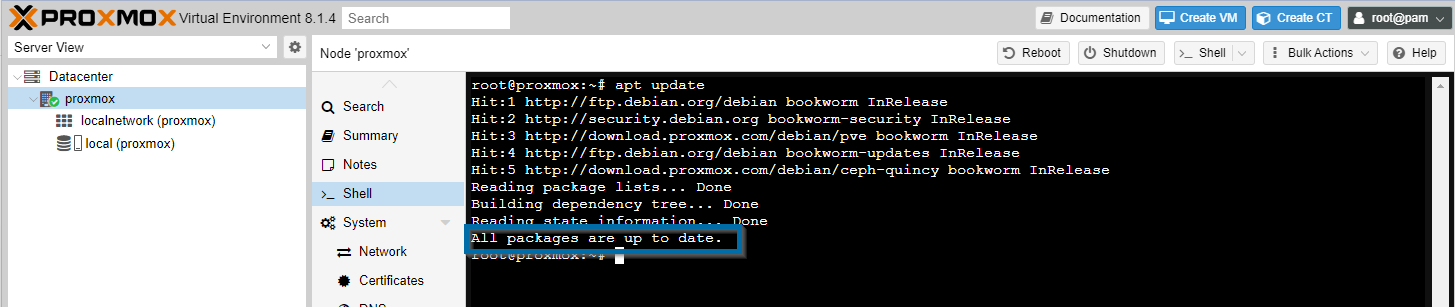
We can continue with the configuration.
Now let’s talk about networking for a little bit. Remember that we mentioned in the Network design that we will need VLANs for the lab framework?
The primary objective is to establish a well-organized and segmented lab environment, catering to an array of tasks such as SIEM, malware analysis, vulnerability scanning, ethical hacking, corporate environment, and much more… if you wanted and needed.
Developing this project, I have read a lot of resources, guides, articles, documentation, videos, many things that have helped me understand this better and improve my skills and learn more.
Now you can create corresponding bridges. This is done by going to your node and selecting System > Network > Create > Linux Bridge

Enter all the information to the interface, like the corresponding IP and comment with the name of the network plus the IP. (good practice :D)
For this one I configured it like this so I can related to my LAN port on the pfsense firewall we are going to configured later
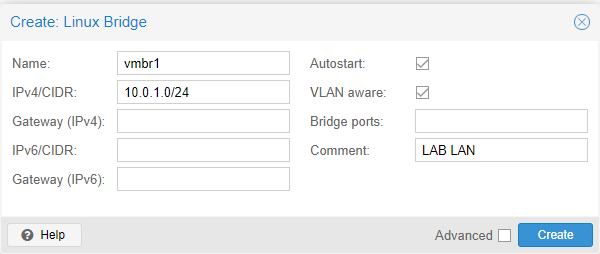
Hit create and then click on Apply Configuration

At the end you will going to have something like this:
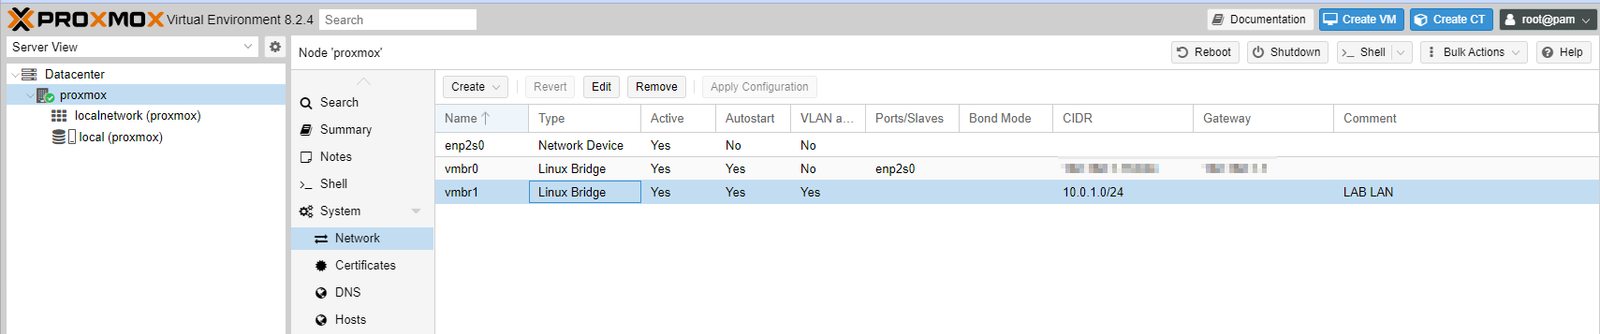
This is for now on the proxmox configurator. Maybe we will have to come back here if we need to do something else regarding the configuration.
See you on the next chapters
–Installing and configuring the firewall–
Go back to Module 3: Infrastructure & Virtualization section 3.4 VM Creation and Management if you want to follow along this guide with me.
Description
Step by Step Proxmox Virtual Environment (Proxmox VE)